
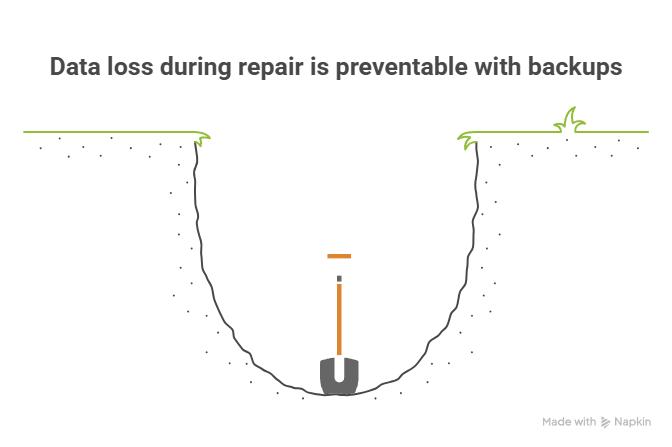
Is your iPhone acting up? A cracked screen, a battery that won’t hold a charge, or a mysterious software glitch can be incredibly frustrating. Before you hand your precious device over to a repair technician, there’s one critical step you absolutely cannot skip: backing up your data. Sending a phone for repair without a backup is like sending a ship into a storm without life rafts—you risk losing everything.
Many repair processes, especially those involving software issues or screen replacements, can lead to data loss or even require a full factory reset. Imagine losing years of photos, important contacts, and countless messages in an instant. It’s a nightmare scenario that is entirely preventable. This comprehensive guide will walk you through exactly how to back up your iPhone before repair, ensuring your digital life remains safe and sound. We’ll cover the two primary methods, iCloud and your computer, so you can choose the one that works best for you and proceed with your repair confidently.
Key Takeaways at a Glance
| Feature | iCloud Backup | Computer (Mac/PC) Backup |
| Storage | Limited by your iCloud plan (5GB free) | Limited by your computer’s hard drive space |
| Convenience | Automatic, wireless backups over Wi-Fi | Manual, requires a physical connection |
| Speed | Slower, dependent on internet speed | Faster, direct transfer via cable |
| What’s Backed Up | Most essential data and settings | A more complete copy, including Health data (if encrypted) |
| Best For | “Set it and forget it” daily protection | Comprehensive, pre-repair security |
Part 1: The Golden Rule – Why Backing Up is Non-Negotiable
Before we dive into the “how,” let’s solidify the “why.” A backup is a complete copy of the information on your iPhone. Think of it as a digital snapshot of your device at a specific moment in time. Here’s why it’s the most crucial step before any repair:
- Preventing Data Loss: Technicians may need to reset your iPhone to its factory settings to diagnose or fix an issue. This action erases everything. A backup is your only way to restore your data afterward.
- Peace of Mind: Knowing your memories and important information are securely saved allows you to hand over your device without anxiety.
- Smooth Restoration: Once your iPhone is repaired, you can restore it from your backup, and it will be exactly as you left it—apps, settings, photos, and all.
- Protection Against the Unexpected: Sometimes, things go wrong during a repair. A device could be damaged further or lost. Your backup ensures that even if the physical device is gone, your data is not.
Part 2: Choosing Your Backup Method – iCloud vs. Computer
Apple provides two robust methods for backing up your iPhone: iCloud and your computer (using Finder on a Mac or iTunes on a PC). Both are excellent, but they serve slightly different needs.
Method 1: Backing Up Your iPhone with iCloud
iCloud is Apple’s cloud-based storage service, and it’s arguably the easiest way to keep your iPhone backed up. It works wirelessly over Wi-Fi, often automatically in the background.
When to Use iCloud:
iCloud is perfect for regular, automatic backups. However, for a pre-repair backup, you need to ensure you have enough storage and manually trigger a final, up-to-the-minute backup.
Step-by-Step Guide to iCloud Backup:
- Connect to Wi-Fi: An iCloud backup requires a stable Wi-Fi connection. Navigate to
Settings>Wi-Fiand ensure you’re connected. - Open iCloud Settings: Go to
Settings, tap on[Your Name]at the top of the screen, and then selectiCloud. - Navigate to iCloud Backup: Scroll down and tap on
iCloud Backup. - Enable iCloud Backup: If it’s not already on, toggle the switch for
iCloud Backupto the “on” position. - Initiate the Backup: Tap
Back Up Now. It’s crucial to perform this manual backup right before you plan to take your phone for repair to ensure the most recent data is saved. - Verify the Backup: Remain connected to Wi-Fi until the process is complete. Under the
Back Up Nowbutton, you’ll see the date and time of the “Last successful backup.” Confirm that this matches the current time.
Pro Tip: iCloud only offers 5GB of free storage. If you have more data than that (which most people do), you’ll need to upgrade your storage plan. You can do this in Settings > [Your Name] > iCloud > Manage Account Storage. The cost is minimal for the peace of mind it provides.
Method 2: Backing Up Your iPhone to a Computer (Mac or PC)
Using your computer to create a local backup is a more traditional but highly reliable method. It’s often faster than iCloud and creates a more comprehensive copy of your device. For a pre-repair backup, this is the method we most strongly recommend.
Using Finder on a Mac (macOS Catalina 10.15 or later):
- Connect Your iPhone: Connect your iPhone to your Mac using a Lightning-to-USB cable.
- Open Finder: Open a new Finder window. You should see your iPhone listed in the sidebar under “Locations.” Click on it.
- Trust This Computer: You may need to unlock your iPhone and tap “Trust” on the alert that appears. You might also need to enter your passcode on your iPhone and your computer password on the Mac.
- Select Backup Options: In the “General” tab, under the “Backups” section, select
Back up all of the data on your iPhone to this Mac. - Encrypt Your Backup (Highly Recommended): This is a critical step! Select the checkbox for
Encrypt local backup. An encrypted backup includes sensitive data that a standard backup does not, such as saved passwords, Wi-Fi settings, website history, and Health data. You will be prompted to create a password—choose one you will remember, as there is no way to recover it if lost. - Start the Backup: Click the
Back Up Nowbutton. - Verify the Backup: Once the backup is complete, the “Last backup to this Mac” date and time will update.
Using iTunes on a PC or Older Mac (macOS Mojave 10.14 or earlier):
The process is very similar if you’re using a Windows PC or an older Mac, but you’ll use the iTunes application.
- Connect Your iPhone: Connect your iPhone to your computer with its cable.
- Open iTunes: Launch iTunes. If you don’t have it, you can download it from the Microsoft Store on Windows or the Apple website.
- Locate Your Device: Click the small iPhone icon that appears in the top-left corner of the iTunes window.
- Select Backup Options: In the “Summary” tab, under the “Backups” section, select
This Computer. - Encrypt Your Backup: Just like with Finder, check the box for
Encrypt local backupand create a memorable password. - Start the Backup: Click the
Back Up Nowbutton. - Verify the Backup: After it finishes, check the “Latest Backup” time in the same window.
Part 3: The Final Steps Before You Hand It Over
Once your data is securely backed up, you’re almost ready. There are a few more crucial steps to protect your privacy and ensure a smooth repair process.
Step 1: Turn Off “Find My iPhone”
Repair technicians cannot perform most repairs if “Find My iPhone” is enabled, as it’s an anti-theft feature that locks the device to your Apple ID.
- Go to
Settings>[Your Name]>Find My. - Tap on
Find My iPhoneand toggle the switch off. - You will be required to enter your Apple ID password to confirm this change.
Step 2: Erase Your Data
With your backup safely stored, the next step is to wipe your personal information from the device. This protects your privacy while the phone is out of your hands.
- Go to
Settings>General>Transfer or Reset iPhone. - Tap on
Erase All Content and Settings. - Follow the on-screen prompts to complete the process. Your iPhone will restart to the “Hello” setup screen, just like a new device.
Step 3: Remove Your SIM Card and Accessories
- Use a SIM ejector tool (or a small paperclip) to remove your SIM card. Keep it in a safe place.
- Remove any case, screen protector, or other accessories from your iPhone. These will likely not be returned. For more information on preparing your device, you can contact us.
Part 4: After the Repair – Restoring Your Data
Once you get your repaired iPhone back, it’s time to bring your digital life back onto the device. During the initial setup process, you’ll be given the option to restore your data.
Restoring from an iCloud Backup
On the “Apps & Data” screen, choose Restore from iCloud Backup. Sign in with your Apple ID and select the backup you made just before the repair.
Restoring from a Computer Backup
On the “Apps & Data” screen, choose Restore from Mac or PC. Connect your iPhone to the same computer you used to back it up. Open Finder or iTunes, select your device, and click Restore Backup. Choose the correct backup file and enter your encryption password if you set one.
Frequently Asked Questions
Q: How long does it take to back up an iPhone?
A: The time it takes depends on the amount of data and your connection speed. An iCloud backup can take anywhere from 30 minutes to a couple of hours over a fast Wi-Fi connection. A backup to a computer is generally faster, often taking 15-45 minutes.
Q: What if I don’t have enough iCloud storage for a backup?
A: If you don’t have enough storage, you have two options. You can either purchase more iCloud storage from Apple, which is a quick and easy solution, or you can use the free computer backup method using Finder or iTunes, which is only limited by your computer’s available disk space.
Q: Does an iPhone backup save my passwords?
A: An iCloud backup saves some passwords via iCloud Keychain. However, a computer backup will only save your passwords if you choose the “Encrypt local backup” option. This is a major reason why we recommend encrypted computer backups before a repair, as it makes restoring your device much more seamless.
Conclusion: Your Data is Your Responsibility
Your iPhone is a gateway to your digital world, and protecting the data it holds is paramount. While repair shops are there to fix the hardware, safeguarding your personal information is ultimately up to you. By taking the time to perform a complete backup—preferably an encrypted one to your computer—you eliminate the risk of data loss and ensure a stress-free repair experience. Follow the steps outlined in this guide, and you can hand over your device with the confidence that your photos, messages, and memories are safe and sound, ready to be restored once your iPhone is back in your hands.
Ready to get your device fixed? Schedule your repair with us today and let our expert technicians get your iPhone back to perfect condition!

Phonebulance is your one-stop center!
Want to get the most out of your smartphone? At Phonebulance, we’re your one-stop center for all things smartphone! Whether you’ve cracked your screen, dropped it in water, or it’s simply acting sluggish, our certified technicians can diagnose and fix a wide range of issues. We use top-quality parts and offer a [warranty period] warranty on repairs, ensuring your device gets back to peak performance. Don’t wait – contact us today or make an appointment to learn more about our services and keep your smartphone connected and functioning like new!
Here is the list of our smartphone repair services:
- Apple iPhone
- Apple Watch
- Apple iPad
- Apple iPod
- Samsung Galaxy S Series
- Samsung Galaxy Note Series
Samsung Galaxy Tab - Google Pixel and Nexus
- OnePlus
- Other brands (LG, Motorola, HTC, Blackberry…)
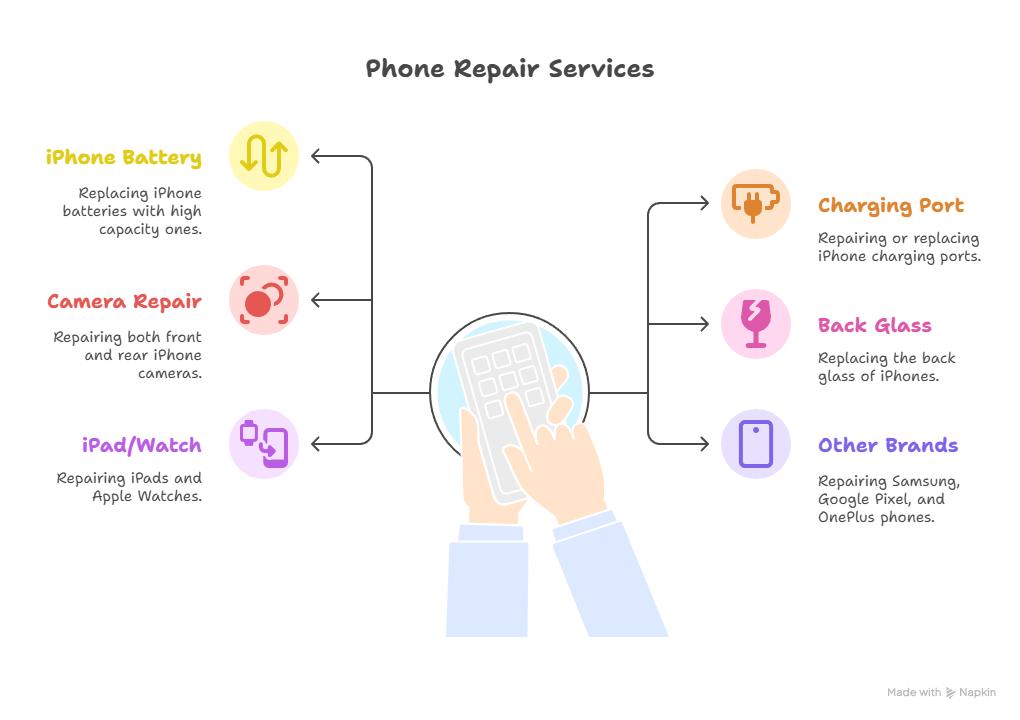
Here is the list of our repair and fixing prices:
- iPhone LCD Screen Replacement
- iPhone Charging Port Replacement
- iPhone Battery Replacement (High Capacity)
- iPad screen replacement
- iPhone Back Camera Lens Replacement
- iPhone Rear Camera Repair
- iPhone Back Glass Repair Cost

0 Comments